
Last updated September 11, 2026
Full 25-point door and opener safety check with every visit - springs, cables, rollers, tracks, and your LiftMaster or Chamberlain opener included
You get a price before we start. It does not change when the truck arrives.


 Before
 After
After Before
 After
After Before
 After
AfterDIY vs Professional Garage Door: The Cedar Park Homeowner’s Decision Guide
A torsion spring on a double garage door holds roughly 150 to 200 pounds of torque in its coils. When it breaks, it releases that energy in a fraction of a second. I’ve seen the aftermath in Cedar Park garages where a homeowner tried the “just watch a video” approach: bent torsion tubes, cracked flag brackets, and one door that fell off its tracks entirely because the cable let go while the spring was off. This guide will walk you through exactly which garage door jobs a careful homeowner can handle safely, which ones belong to a pro, and how to tell the difference before you put a wrench to anything. For a full maintenance checklist Cedar Park homeowners can use year-round, see our related guide. We’ll cover what Cedar Park’s specific climate and construction patterns mean for your door, and where the real line sits between saving money and spending a lot more of it.
Quick Answer
Most garage door maintenance and minor fixes are safe to do yourself, but anything involving torsion springs, lift cables, or track replacement belongs in professional hands. The spring system holds enough stored energy to cause serious injury, and the tools to handle it correctly cost more than the service call. In Cedar Park, where summer heat and limestone soil shift slabs and throw doors out of alignment, the smart DIY list is short: sensor alignment, lubrication, weatherseal replacement, and remote reprogramming. Everything else comes with a risk that outweighs the savings.
Table of Contents
- The Genuinely DIY-Safe List: What You Can Handle This Saturday
- The Never-DIY List: Springs, Cables, and Tracks
- How to Diagnose Before You Touch Anything
- Tool Reality Check: What You Actually Need at Home
- What Cedar Park Specifically Does to Garage Doors
- What a YouTube Video Never Shows You
- What a Botched DIY Repair Actually Costs to Undo
- When to Call a Professional
The Genuinely DIY-Safe List: What You Can Handle This Saturday
Let’s start with what you can actually do without calling me or anyone else. These tasks do not involve stored energy, tension, or the risk of a 200-pound door falling on you. They require basic tools most Cedar Park homeowners already have in the garage, and they take under an hour.
Sensor alignment. The photo eyes at the bottom of each track get knocked out of alignment all the time, usually by a trash can, a rake handle, or a kid’s bike. When both sensors were solid green, they aligned correctly. If one blinks or glows red, loosen the wing nut, aim the sensor at the other one until the light goes steady, and tighten it back down. That’s it. No voltage risk, no spring risk.
Lubrication. A can of white lithium grease or silicone spray on the hinges, rollers, and the torsion spring coils (yes, the spring itself can be lubricated safely without touching it under tension) quiets a noisy door and extends its life. Do this twice a year in Cedar Park because the heat dries everything out fast. Do not use WD-40. It’s a solvent first, not a lubricant, and it will strip whatever grease is already there.
Weatherseal replacement. The rubber strip along the bottom of the door rots in Cedar Park’s heat and UV exposure, usually within 2 to 3 years. You can slide the old one out and the new one in without removing the door. Measure the width first.
Remote reprogramming. If your remote stopped working and the opener’s lights flash but the door does not move, the issue may be in the remote. Genie and Chamberlain openers have simple learn-button sequences printed right on the motor unit. A quick reset takes about two minutes.
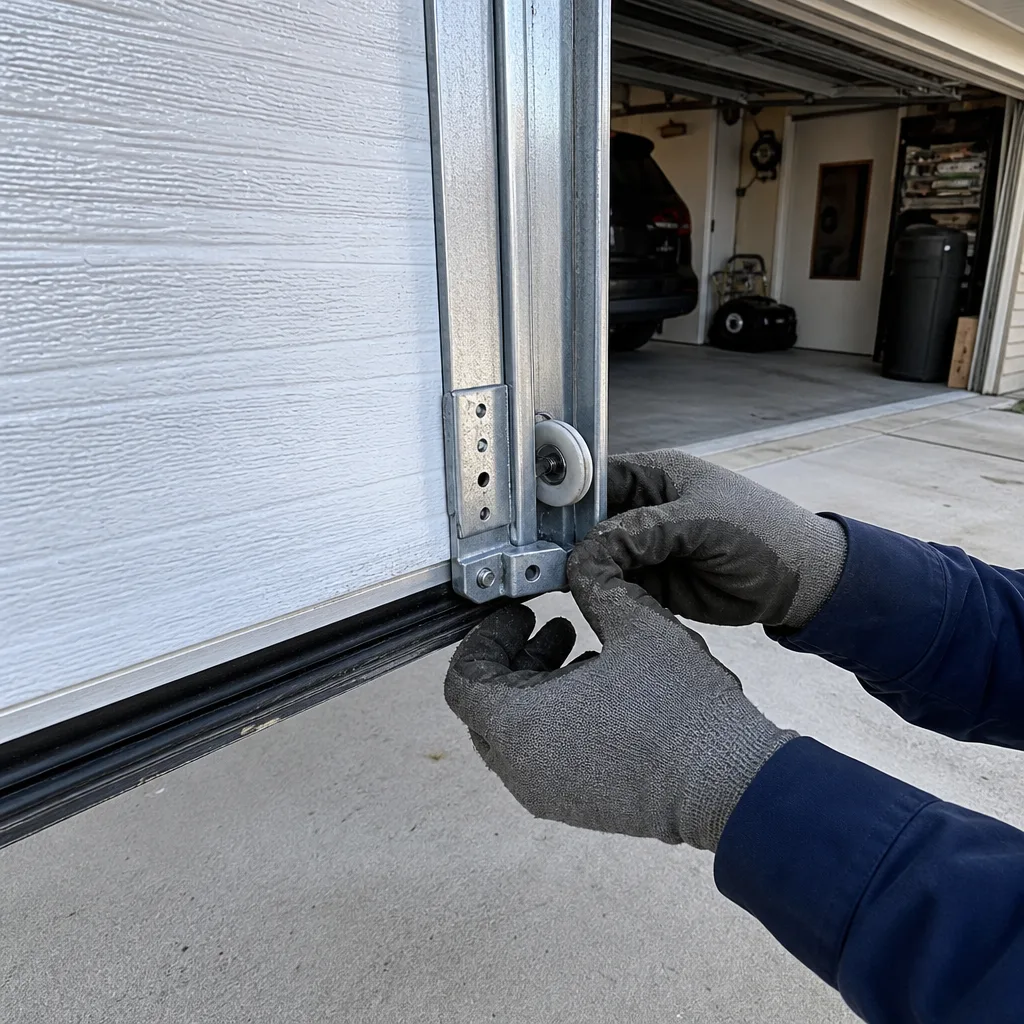
Track cleaning. The vertical tracks collect dust, spiderwebs, and grime. Wipe them down with a rag. Tighten any bolts that have loosened on the brackets. You can do this, but do not loosen the track bolts or try to realign a track yourself. Cleaning and tightening on a straight, securely mounted track is fine. Reshaping or repositioning a track is not.
These five tasks cover about 70 percent of the “my door is acting up” calls I get. If yours is still not right after these, move to diagnosis.
The Never-DIY List: Springs, Cables, and Tracks
This is the section that keeps people out of the emergency room. There are three components on a garage door where the risk is not about skill level or common sense. The risk is stored mechanical energy that does not care how careful you are.
- Torsion springs. A torsion spring holds the energy to lift your entire door. When it breaks, it unwinds violently. When you try to replace one and the winding bar slips, that same violence goes into your hand, wrist, or face. A broken jaw from a winding bar is not a hypothetical. It happens to experienced people on bad days, and to beginners on their first turn. Do not touch torsion springs. Call someone who has wound a thousand of them.
- Lift cables. The cables on either side of the door run through the spring system and carry actual load. They are under constant tension even when the door is down. A frayed cable can snap while you’re looking at it. When it does, the unbalanced door can slam down or jerk violently against the remaining cable. Cable replacement requires releasing tension in a controlled sequence, and that sequence includes tools and knowledge most homeowners do not have.
- Track replacement or major realignment. A garage door weighs between 130 and 300 pounds depending on the material. The tracks guide that weight every time the door moves. If a track is bent, sprung, or has pulled away from the wall, the door can bind mid-travel and come off the tracks. When it comes off, it falls. You do not want to be under it. Track work is structural.
If you take nothing else from this guide, take this: a door is 200 pounds riding on two springs. Respect it. The savings on a DIY spring job is maybe $150 to $300 in labor. The cost of an ER visit, a missed week of work, or a door that falls on your car is a lot more than that.
How to Diagnose Before You Touch Anything
Most garage door problems fall into one of four categories. Knowing which category you are in tells you whether you can handle it or whether you should pick up the phone.
The door does not move at all. If the opener runs but the door stays put, the issue is almost always the opener’s travel or force settings, the emergency release cord, or a broken spring. Here is the test: pull the red emergency release cord so the door moves manually. If you can lift the door by hand, the spring is intact and the problem is the opener or its settings. If the door feels like it weighs 300 pounds when you try to lift it, the spring is broken. Do not attempt to replace it. In our experience, this test alone tells you half of what you need to know in under 30 seconds.
The door opens partway and stops or reverses. This is usually a sensor issue, an obstruction, or a force-setting issue in the opener. If you clear the obstruction and clean the sensor and it still reverses, the force settings may need adjustment. That is a 10-minute job for someone who knows the opener’s limits. If you have a Genie opener, the limit switches are on the back. If a Chamberlain, they are on the side. The manual tells you how to adjust. But if you do it wrong and set the force too high, the door will crush whatever is under it instead of reversing. This is a good task to have handled by a pro the first time while you watch and learn.
The door is loud. Grinding, squeaking, or rattling usually means lubrication, loose bolts, or worn rollers. This is the most common DIY fix. Lubricate everything, tighten the bolts you can reach, and check the roller bearings. Metal rollers with exposed bearings wear out in about 7 years in Cedar Park’s heat and dust. Nylon rollers with sealed bearings last much longer. Swapping rollers requires bending the track slightly to pop them out. It is doable, but many people call me after trying it and snapping a track flange.
The door looks crooked or sags on one side. This is a spring tension or cable issue. Do not attempt to straighten it by adjusting the spring yourself. You will make it worse. The fix is a rebalance or a cable replacement, and that belongs on the pro list.
Run through this diagnosis before you tell yourself “I’ll just take a look.” Taking a look at the wrong component is where the trouble starts. Our Garage Door Repair in Cedar Park page has more on what the specific failure modes look like, and you can call the shop directly if you’re not sure which category you’re in.
Tool Reality Check: What You Actually Need at Home
The DIY-versus-pro decision gets made in the tool aisle as much as it does in the garage. Here is the honest inventory of what the safe tasks require, and what the unsafe tasks require that you probably do not have.
- For sensor alignment: A Phillips screwdriver or a 7/16-inch wrench. That is it.
- For lubrication: A can of white lithium grease or silicone spray, about $8 to $15, and a rag. Nothing else.
- For weatherseal replacement: The new seal itself ($30 to $70 depending on door width), a utility knife, and a flathead screwdriver to help coax it through the track channel.
- For remote reprogramming: The existing remote, the opener’s manual (or the model number to look it up online), and the learn button on the motor unit. No tools.
- For track cleaning: A rag, a brush, and a few bolts to replace any that have rusted or stripped. Maybe a socket set if you’re tightening bracket bolts.
Now compare that to what spring replacement actually requires: two specially sized winding bars ($20 to $40), a socket set, a tape measure, and a solid understanding of spring math - wire size, inner diameter, and length to determine the correct replacement spring. That is the part the video leaves out. A spring that is too strong will yank the door up and burn out the opener. A spring that is too weak will not lift the door. Calculating the right spring means measuring the exact wire gauge and coil count of the old one. Even if you get the spring off safely, you still need to wind it to the correct number of quarter-turns, and if you are off by two turns, the door will not balance. There is no “test it and back it off” with a wound spring. The first time you release a winding bar is the most dangerous moment of the entire job.
Real talk: the tools to do the safe tasks are what you already own. The tools to do springs properly are cheap but the knowledge is expensive. I count spring cycles the way you count tire miles. The average spring is rated for 10,000 cycles. A door that goes up and down four times a day hits that in about seven years. When I replace a spring, I can tell you what is left on the old one and how long the new one should last in your specific door. That is the difference between a tool and a professional.
What Cedar Park Specifically Does to Garage Doors
Cedar Park has three things working against your garage door that most generic advice ignores: heat, soil, and the speed at which the town grew. I have been running Otto’s Garage Door home out of this county since 2004, and I have seen what the local conditions do to hardware.
Heat and sunlight. Cedar Park routinely hits 100+ degrees in July and August, and the west-facing garage doors take direct afternoon sun. That UV exposure breaks down rubber weatherseals, fades and warps polyurethane insulation, and dries out the grease on hinges and rollers faster than in cooler climates. A door that would go 10 years without service in Minnesota might need roller and seal attention every 5 to 7 years here. When I see a door in the Leander-area subdivisions near the new construction, I expect the seals to be shot within three summers.
Limestone soil and slab movement. Cedar Park sits on the Edwards Plateau, and the limestone bedrock under the clay means two things: post-tension slabs that resist movement, and a lot of homes built in the 2000s boom on standard slabs that shift with wet and dry seasons. When a slab shifts half an inch, the garage floor moves, the door’s bottom seal gap changes, and the tracks can go slightly out of square. The door still works, but it rubs, squeaks, or leaves a wedge of daylight at one corner. That is not a spring problem and not a DIY fix. That is a track and bracket adjustment tied to how your specific slab has settled.
Construction boom standards. Cedar Park grew fast, and fast construction means builder-grade garage door hardware: thin-gauge tracks, lightweight hinges, and springs sized to the absolute minimum cycle life. A builder-grade door on a house from 2006 may have a spring that was rated for 5,000 cycles and is well past its expected life by now. When I replace a spring on a home in the Buttercup Creek or Red Oaks neighborhoods, I often see hardware that was installed to hit a price point, not to last 20 years. My replacement is always sized for the long haul.
These local factors matter because they change the math on the DIY-versus-pro decision. A generic online guide assumes a perfectly square concrete slab, a newish door, and mild weather. Your Cedar Park door may be 18 years old, builder-grade, on a shifting slab, and sun-baked on one side. The diagnosis is different here.
What a YouTube Video Never Shows You
The phrase “I watched a YouTube video” comes up in about a third of my calls that start with a DIY attempt gone wrong. I understand why. The video shows a clean garage, a brand-new door, perfect lighting, and a guy who has done the job a hundred times. Here is what the video does not show.
The video door is installed square. Most YouTube garage door repairs are filmed on a bench or a brand-new door in a subdivision built last year. Your Cedar Park door was installed in 2008 on a slab that has moved, with a track that has been bumped by a lawn mower and a bracket that has pulled loose. The realignment steps make up 80 percent of what I do on a typical repair call. The video skips them because they are hard to show on camera.
The video never shows the stuck bolt. Every real garage door has one bolt that will not come out without penetration oil, a breaker bar, or a heat wrench. The video guy turns his bolts with two fingers and a smile. You will not. When that bolt strips, you are now replacing a bracket you did not plan to touch, and the job just tripled.
The video does not show you the moment after something goes wrong. That is the critical scene: the winding bar slips, the door jumps on the track, the cable unwinds off the drum, and now the door is stuck five inches from the floor with the spring half-wound and dangerous. The video cuts to the finished product. Real life does not cut away.
The video assumes your wife’s car is not in the garage. Or your truck, or your tool chest. Real garages have stuff in them. Moving a 200-pound door with obstacles on both sides is not the same as the empty two-car in the video. That is how mirrors get clipped and door panels get dented.
I do not say all this to scare you off of every DIY task. The list earlier in this guide is genuinely doable. The point is that watching a video about a spring replacement and then attempting it on a 16-year-old door in a Cedar Park garage is not the same job. It is the difference between following a cookbook and cooking in a kitchen that’s on fire.
What a Botched DIY Repair Actually Costs to Undo
Here is the number you won’t find in most guides because it’s not flattering to the DIY narrative. When a spring repair goes wrong, the professional fix costs more than it would have originally, not less. In Cedar Park’s market, a standard torsion spring replacement by a pro runs $180 to $340 depending on the spring size and door weight. For a deeper look at pricing, see our Garage Door Cost Breakdown: The Cedar Park Homeowner’s Reference for 2026. That includes the spring, the labor, and a balance check. I quote on the phone and I hold that number when I get there, because the price you were quoted is the price you pay. That is non-negotiable with me.
Now, let’s run the botched version. You buy the spring online for $60 to $100. You spend an afternoon failing to get the old one off. You strip a set screw, which means the winding cone is now seized to the torsion tube. A professional now needs to replace the tube along with the spring: add $80 to $120. Or the door came off the track when the cable let go: add $150 to $250 for a track reset and cable replacement. Or the door slammed down and bent a bottom panel: add $300 to $600 for a panel replacement if the model is still made, or more for a full door if it is discontinued. That $100 DIY spring job is now a $600 to $900 professional repair.
Then there is the injury cost. The average emergency room visit for a hand or wrist injury runs into the thousands even with insurance, and a broken bone means missed work. I am not your accountant, but you can do that math.
The other cost nobody talks about is time. A professional spring replacement with the right tools and the right parts takes under an hour. A novice with a YouTube video and a Harbor Freight winding bar set spends four to six hours, and half of those hours are at the ER or under a door that is halfway up and stuck. Time is the one thing you cannot buy back, and it is the reason I tell people who are on the fence to call me instead. I would rather you spend an hour watching me do it once than spend a day failing at it and an evening in the hospital.
If the price is the main thing holding you back, call the shop. I quote over the phone, and there is no charge to come out and look. You will know the number before I ever turn the truck down your street. If you have a written estimate from another company, bring it out. I will give you a Free Second Opinion on any written estimate and there is no trip charge inside the county. Those offers are not gimmicks, they are how a local shop keeps doors working and neighbors coming back for 29 years. You can also explore more guides & resources on our blog.
When to Call a Professional
Call a professional when you see a broken or stretched spring, a frayed or off-track cable, a bent track, or a door that feels unusually heavy when you lift it manually. Call if the door has come off its tracks or if it slams down when you release it. Call if the opener is straining and you have already cleaned the sensors and lubricated everything. If you are not sure, call anyway. The diagnosis is free at Garage Door Opener in Cedar Park service calls are quoted up front, and I would rather tell you on the phone that it is a five-minute DIY fix than watch you guess wrong. Otto’s Garage Door offers free estimates in Cedar Park - call (737) 383-3934 and a live person will answer, day or night. If the door is sealed shut and your vehicle is trapped inside at 9 p.m., I will still answer, and I will still hold the quoted price when I get there.
Common Mistakes to Avoid
- Adjusting the spring to “fix” a crooked door. A crooked door is a cable or track issue, not a spring tension issue. Turning the spring to compensate makes the door unbalanced and dangerous.
- Using WD-40 on the rollers and hinges. WD-40 dissolves the existing grease and leaves the metal dry. Use white lithium grease or silicone spray instead.
- Ignoring a snapping or popping sound. That sound often means a spring is about to break. Addressing it before it breaks is cheaper and safer than after.
- Trying to replace a bottom seal without measuring the door width. Cedar Park doors come in several standard widths, and buying the wrong seal means a second trip to the store and a seal that does not seal.
- Forgetting to pull the emergency release cord before trying to open a broken door manually. Pulling the cord lets the door move freely instead of fighting the opener rail. But if the spring is broken, that door is still 200 pounds. Do not lift it alone.
- Assuming the opener is bad when the door is just unbalanced. The opener is often the victim, not the culprit. If the door is heavy, the opener works harder and wears out faster. Fix the balance and the opener usually quiets down.
- Watching one YouTube video and thinking you have seen every possible failure mode. You have not. The video does not show your slab settlement, your builder-grade hardware, or your stripped bolts. Knowing when to stop is the skill.
Frequently Asked Questions
Spring repair in Cedar Park typically runs $180 to $340 for a torsion spring replacement, depending on the door’s weight and the spring’s size. I quote the exact number on the phone and hold it at the door, so there are no surprises. Call (737) 383-3934 for your exact quote - estimates are free.
You can safely handle sensor alignment, lubrication with white lithium grease, bottom weatherseal replacement, remote reprogramming, and track cleaning. These tasks require no stored-energy work and basic tools. Anything with springs, cables, or heavy track realignment should go to a professional.
Yes. Torsion springs hold enough stored energy to break bones. Even with the “right” tools and a video guide, the first winding bar slip can send you to the emergency room. This is the one job that is never on the DIY list, no matter how handy you are.
Yes. Calls are answered by a live person 24/7, including nights and weekends. A broken door is an emergency when your vehicle is trapped inside, and I will quote the job on that call and hold the number when I arrive. Call (737) 383-3934 any time.
Cedar Park’s heat and seasonal slab movement affect door alignment. Summer heat dries out seals and lubricants, and wet-to-dry cycles in the clay soil can shift the slab just enough to throw your tracks slightly out of square. A door that binds in one season and works in another usually needs a track reset by a pro.
Most springs are rated for 10,000 cycles, which works out to about 7 years for a door that cycles four times a day. Builder-grade springs on Cedar Park’s fast-built homes may be rated for half that. If your springs are over 10 years old, they are on borrowed time and worth having inspected.
The Bottom Line
The DIY-versus-professional garage door decision is not about how handy you are. It is about stored energy, the tools and knowledge required to handle it, and the specific conditions of your Cedar Park home. Lubricate, align sensors, replace seals, and reprogram remotes on your own. Leave springs, cables, and tracks to a pro who has done it a thousand times and carries the right parts on the truck. The savings from a DIY spring job disappear the moment something slips, and the real cost is measured in hospital bills and damaged doors, not just dollars. If you are unsure where your problem falls, call the shop. The person who answers is the same one who will show up, quote the job over the phone, and hold that number at the door. For Garage Door Installation in Cedar Park or any repair, call (737) 383-3934 and get a straight answer before you touch anything.
Written by Otto Reinhardt, Owner at Otto’s Garage Door, serving Cedar Park since 2004.